FirebaseのFirebase Cloud Messaging 機能でユーザーに通知をNode.jsサーバーから送る方法
今回執筆を担当する ちゅらデータのAustin John Mayer・井上オースティンです。
この記事では、FirebaseのFirebase Cloud Messaging機能でユーザーに通知をNode.jsサーバーから送る方法を紹介します。
Firebaseのアカウントとプロジェクトを立ち上げていることを前提にしています。Firebaseでプロジェクトを作ったことがない方は、もしかしたら先に前回の記事を読んでいただいた方がいいのかも知れません。
前回の記事はこちら→『既存のWebサイトに瞬時更新コメント欄を追加する方法 Firebaseを用いて1日で実装してみた』
本記事の流れとしては、Firebaseのサービスを使うことができるNode.jsのカスタムサーバーを作り、フロントエンドで通知を出すService Workerを作っていくような感じです。
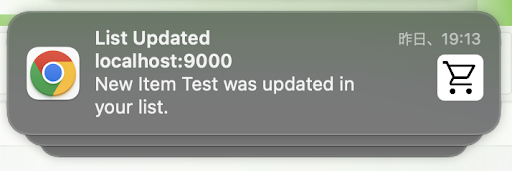
本記事で言う通知とは、以下の写真のような通知のことです
Push API と Notifications API を使って出すようにします。
目次
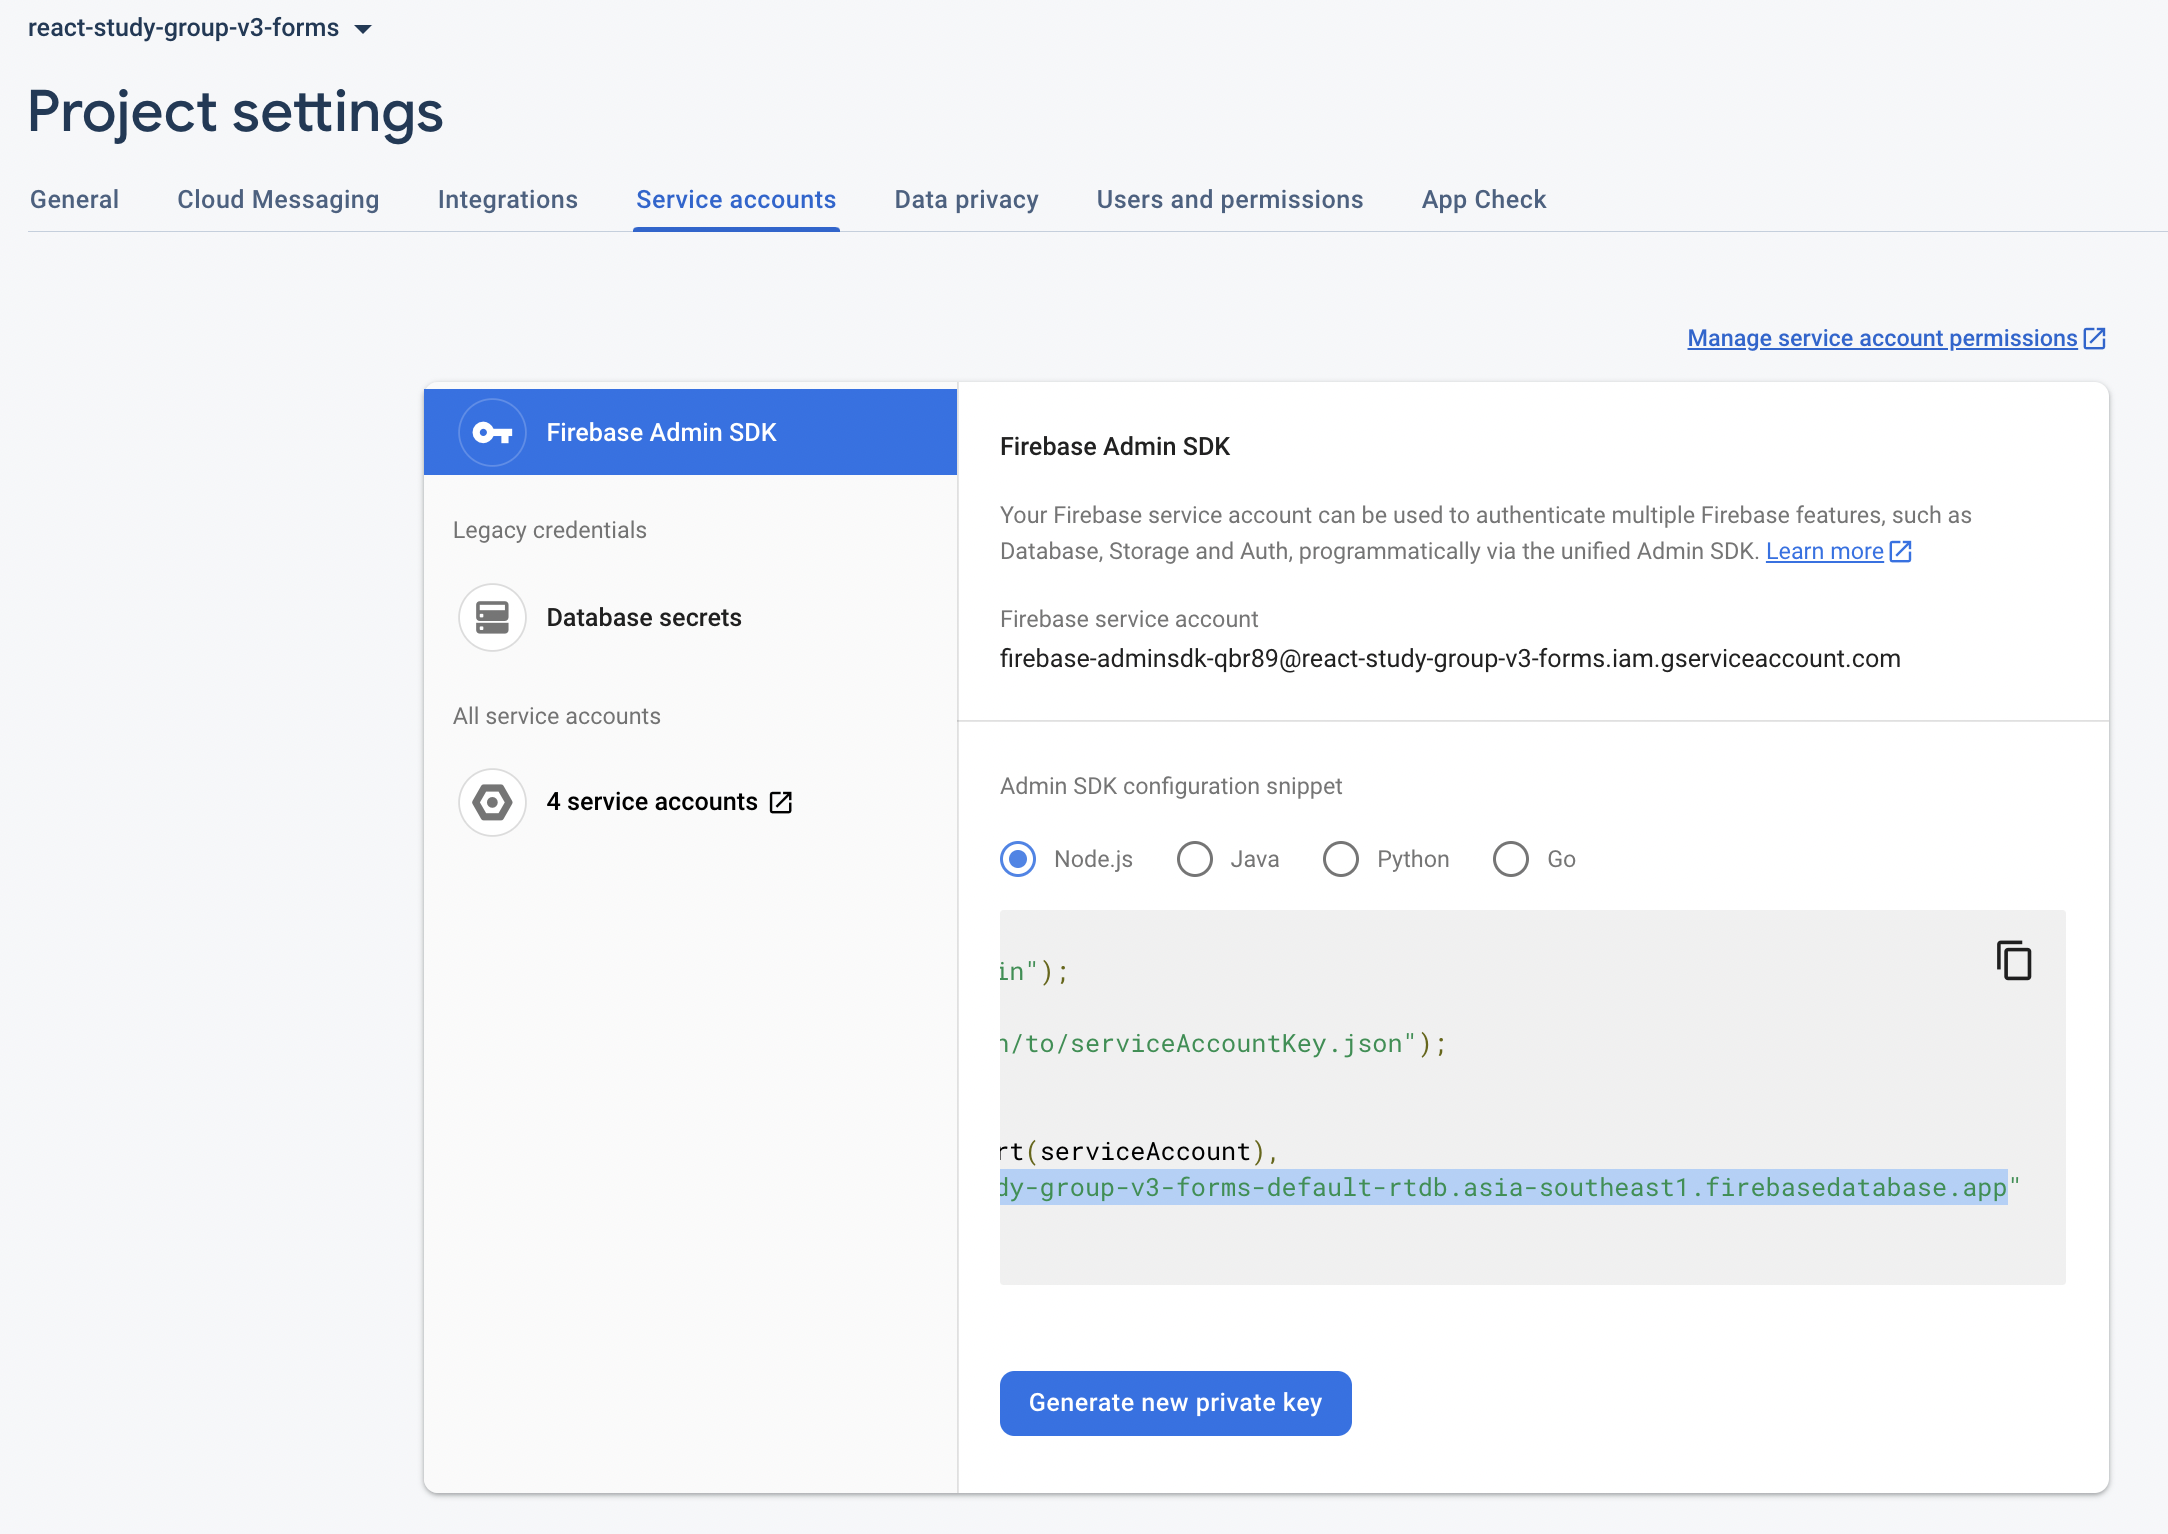
Firebaseでサービスアカウントを発行
まず、Firebaseプロジェクトをカスタムサーバーからアクセスするためのキーを発行しておきます。
こちらの正式ドキュメントを参照しながら作業します。
https://firebase.google.com/docs/admin/setup?authuser=0
こちらのリンクにアクセスし、今回使うプロジェクトを選択してください。
サービスアカウントの秘密鍵を生成
生成された秘密鍵

これでNode.jsのバックエンドサーバーを作る準備が整いました!
Node.jsで通知を送るカスタムサーバーを作成
次、Node.jsで通知を送れるように、Firebase Admin SDKを入れていきます。ただ、その前にサーバー周りの構築をします。
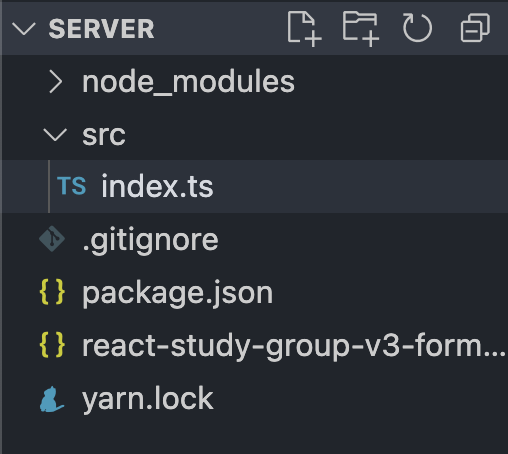
サーバーの開発環境をセットアップ
まずは、任意のディレクトリに入って、yarn initもしくはnpm initでpackage.jsonを作りましょう。
cd project-folder/server
yarn init
Node.jsをnodemon、ts-node、そしてtypescriptで書いておきますので、以下のパッケージをインストールします。
yarn add typescript ts-node @types/node
yarn add -D nodemon
そこでpackage.jsonにscriptsを追加して以下のようにします。
json:server/package.json
{
  "name": "server",
  "version": "1.0.0",
  "main": "index.js",
  "license": "MIT",
  "dependencies": {
    "@types/node": "^17.0.43",
    "ts-node": "^10.8.1",
    "typescript": "^4.7.3"
  },
  "devDependencies": {
    "nodemon": "^2.0.16"
  },
  "scripts": {
    "dev": "nodemon src/index.ts"
  }
}
tsconfig.jsonも追加しておきます。Node.jsだと以下のような設定が筆者のおすすめです。
json:server/tsconfig.json
{
  "compilerOptions": {
    "target": "ES6",
    "module": "commonjs",
    "strict": true,
    "skipLibCheck": true,
    "forceConsistentCasingInFileNames": true,
    "outDir": "./dist",
    "moduleResolution": "node",
    "esModuleInterop": true
  },
  "include": ["src/**/*"],
  "exclude": ["node_modules"]
}
それから、src/index.tsで以下のように単純なhttpサーバーを作っておきます。
typescript:server/src/index.ts
import http from "http";

const headers = {
  "Access-Control-Allow-Origin": "*",
  "Access-Control-Allow-Methods": "OPTIONS, POST, GET",
  "Access-Control-Max-Age": 2592000,
  "Content-Type": "application/json",
};

let lastMessage: string;
let lastMessageSentAt: Date;
const bootedAt = new Date();
const server = http.createServer((req, res) => {
  res.writeHead(200, headers);
  return res.end(
    JSON.stringify({
      bootedAt,
      lastMessage: lastMessage ?? "none",
      lastMessageSentAt,
    })
  );
});

const port = 8080;
server.listen(port, () => console.log(`listening on ${port}`));
headersでCORSの設定を行い、サーバーにリクエストを送ったら、最後に通知をプッシュした通知といつプッシュしたのかの情報をとりあえず取得できるようにしておきましょう。
Firebase Admin SDKを追加し、通知を送るロジックを書く
サーバーがとりあえずできたので、次は上記見ていた正式ドキュメントをまた参照してnpmパッケージをインストールします。
yarn add firebase-admin
そして、カスタムサーバーのダイレクトリにダウンロードした秘密鍵のJSONを移動させます。
index.tsでは以下のようにJSONを読み込んでFirebase Admin SDKを起動させます。
typescript:server/src/index.ts
import http from "http";
import path from "path";
import admin from "firebase-admin";

//prettier-ignore
const key = require(path.resolve(__dirname, "../", "react-study-group-v3-forms-firebase-adminsdk-qbr89-c07948a66d.json"));

const headers = {
  "Access-Control-Allow-Origin": "*",
  "Access-Control-Allow-Methods": "OPTIONS, POST, GET",
  "Access-Control-Max-Age": 2592000,
  "Content-Type": "application/json",
};

let lastMessage: string;
let lastMessageSentAt: Date;
const bootedAt = new Date();
const server = http.createServer((req, res) => {
  res.writeHead(200, headers);
  return res.end(
    JSON.stringify({
      bootedAt,
      lastMessage: lastMessage ?? "none",
      lastMessageSentAt,
    })
  );
});

admin.initializeApp({
  credential: admin.credential.cert(key),
  databaseURL: "https://react-study-group-v3-forms-default-rtdb.asia-southeast1.firebasedatabase.app",
});

const port = 8081;
server.listen(port, () => console.log(`listening on ${port}`));
Realtime Databaseをご使用の場合は、databaseURLも指定しないといけないのですが、Firebase Consoleのプロジェクト設定→サービスアカウントから取得できます。
そして、messagingのサービスを起動させるロジックを追加すると、メッセージを送る準備ができます!
typescript:server/src/index.ts
import http from "http";
import path from "path";
import admin from "firebase-admin";
import { getMessaging, NotificationMessagePayload } from "firebase-admin/messaging";

//prettier-ignore
const key = require(path.resolve(__dirname, "../", "react-study-group-v3-forms-firebase-adminsdk-qbr89-c07948a66d.json"));

const headers = {
  "Access-Control-Allow-Origin": "*",
  "Access-Control-Allow-Methods": "OPTIONS, POST, GET",
  "Access-Control-Max-Age": 2592000,
  "Content-Type": "application/json",
};

let lastMessage: string;
let lastMessageSentAt: Date;
const bootedAt = new Date();
const server = http.createServer((req, res) => {
  res.writeHead(200, headers);
  return res.end(
    JSON.stringify({
      bootedAt,
      lastMessage: lastMessage ?? "none",
      lastMessageSentAt,
    })
  );
});

const firebase = admin.initializeApp({
  credential: admin.credential.cert(key),
  databaseURL: "https://react-study-group-v3-forms-default-rtdb.asia-southeast1.firebasedatabase.app",
});

const messaging = getMessaging(firebase);

const sendMessageToDevices = (fcm: string | string[], notification: { title: string; body: string }) =>
  messaging.sendToDevice(fcm, {
    notification,
  });

const port = 8081;
server.listen(port, () => console.log(`listening on ${port}`));
Service Workerを作り、通知を表示するロジックを実装
ここからは、Service Worker API を使って、ブラウザが通知を受信するコードを書いていきます。
Service Worker APIについて
Service Worker APIが初めてでしたら、簡単にご説明させてください。
Service Workerとは、ブラウザのタブで実行するJavaScriptのスレッドとは独立したJavaScriptのEvent Loopを持ったプロセスです。一つのドメインに対して、一つのService Workerを実行できます。また、ブラウザの仕様で異なりますが、基本的に、そのドメインのタブを消しても、Service Workerは背景で動き続けます。
Service Workerはfetchリクエストをしたり、Notifications APIで通知を出したりすることができます。
また、Service WorkerではメインスレッドでFetch APIを使ったfetchリクエストを傍聴することができ、特定のfetchリクエストに対して違ったリスポンスを返すことができます。一般的には、ネットの通信環境が不安定だと予想されるような状況で、事前にキャッシュに入れたリスポンスをメインスレッドに返してあげるようなことです。
できないことは、メインスレッドのDOMを変更することです。メインスレッドでEventListenerをService Workerに追加し、Service Worker内でEventを配信して、メインスレッドで受信してDOMを変更するような流れになります。
また、Service WorkerはWeb Workerとは似て違います。Service WorkerはWeb Workerでもありますが、Web Workerよりできることが多く、ドメイン一つに対してService Workerは一つしか作れないのです。
Service Workerをバンドル化するための環境を構築
Service WorkerでFirebase Cloud Messagesを受信して、通知を出すのには、Firebase SDKのnpmパッケージを使う必要があります。
npmパッケージを大きく、使うところだけを使いたいので、webpackでビルドできるようにします。
project-name/というようなプロジェクトのルートダイレクトリーに戻ってそこに入ってから以下のコマンドを実行します。
yarn init
yarn add firebase
yarn add -D webpack webpack-cli babel-loader @babel/core @babel/preset-env @babel/preset-typescript typescript
package.jsonを開き、scriptsにbuild-swを追加すると楽です。
json:package.json
{
  "name": "firebase-fcm",
  "version": "1.0.0",
  "main": "index.js",
  "license": "MIT",
  "dependencies": {
    "firebase": "^9.8.3"
  },
  "devDependencies": {
    "@babel/core": "^7.18.5",
    "@babel/preset-env": "^7.18.2",
    "@babel/preset-typescript": "^7.17.12",
    "babel-loader": "^8.2.5",
    "typescript": "^4.7.3",
    "webpack": "^5.73.0",
    "webpack-cli": "^4.10.0"
  },
  "scripts": {
    "build-sw": "webpack --config webpack.sw.config.js"
  }
}
そして、以下のようなwebpackの設定ファイルを作ります。
javascript:webpack.sw.config.js
const path = require("path");
const webpack = require("webpack");
module.exports = {
entry: "./sw/index.ts",
mode: "production",
module: {
rules: [
{
test: /\.ts$/,
exclude: /node_modules/,
use: {
loader: "babel-loader",
options: {
presets: ["@babel/preset-env", "@babel/preset-typescript"],
},
},
},
],
},
resolve: {
extensions: [".ts"],
},
output: {
filename: "firebase-messaging-sw.js",
path: path.resolve(__dirname, "public"),
clean: false,
iife: false, // (() => {})()で包まないように
},
plugins: [
new webpack.EnvironmentPlugin({
NODE_ENV: "production",
FRONTEND_URI: "", // 通知をクリックした時にどのタブを開けばいいか、タブがなければどこのページを読み込んだらいいかを設定したらいい
}),
],
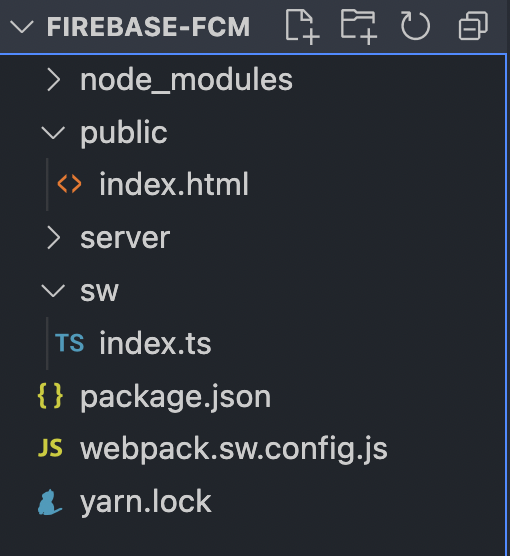
};そして、project-name/swというフォルダを作り、そこにindex.tsを入れます。また、publicというフォルダーも、そこに入るindex.htmlも作っておきましょう。
tsconfig.jsonを二つ追加
プロジェクト全体のtsconfig.jsonと、swフォルダ内のService Worker用のtsconfig.jsonを以下のように追加します。
プロジェクト全体のtsconfig.json
json:tsconfig.json
{
  "compilerOptions": {
    "target": "ES6",
    "allowJs": true,
    "strict": true,
    "sourceMap": true,
    "forceConsistentCasingInFileNames": true,
    "esModuleInterop": true,
    "experimentalDecorators": true,
    "module": "esnext",
    "moduleResolution": "node",
    "jsx": "preserve",
    "incremental": true,
    "outDir": "./dist/",
    "baseUrl": "./",
    "allowSyntheticDefaultImports": true
  },
  "include": ["src/**/*"],
  "exclude": ["node_modules", "dist", "server"]
}
Service Worker用のtsconfig.json
json:sw/tsconfig.json
{
  "compilerOptions": {
    "target": "ES6",
    "lib": ["esnext", "WebWorker"],
    "baseUrl": "../",
  },
  "include": ["./**/*"],
  "files": ["index.ts"],
  "exclude": ["node_modules", "dist"],
  "extends": "../tsconfig.json"
}
こうして、TypeScriptにWebWorker用の型を使うように設定できます。
Service Workerの通知を受信するロジックを追加
Firebaseのアプリ設定が必要なので、発行していない方はこちらの正式ドキュメントに従い、取得してください。
typescript:sw/index.ts
import { initializeApp } from "firebase/app";
import { isSupported } from "firebase/messaging";
import { getMessaging, onBackgroundMessage } from "firebase/messaging/sw";

declare var self: ServiceWorkerGlobalScope; // TypeScriptに、これはService Workerなのだと教える

self.addEventListener("install", (event) => {
  console.log("SW: Installing.", event); // Service WorkerのLife Cycleがあり、まずはインストールされます
});

self.addEventListener("activate", (event) => {
  console.log("SW: Activated.", event); // インストールが終われば、activateをされます。
// ただし、既存のService Workerが動いていれば、そのService Workerが終了するまでactivateはされませんのでご注意!!!
});

const firebaseConfig = {
  apiKey: "AIzaS.....", // ここに自分のアプリのFirebase Configを入れてください。
  authDomain: "react-study-group-v3-forms.firebaseapp.com",
  databaseURL: "https://react-study-group-v3-........firebasedatabase.app",
  projectId: "react-study-group-v3-forms",
  storageBucket: "react-study-group-v3-forms.appspot.com",
  messagingSenderId: "57.....",
  appId: "1:573........c3e138072f"
};

const firebaseApp = initializeApp(firebaseConfig);

isSupported().then(() => {
  const firebaseMessaging = getMessaging(firebaseApp);
  onBackgroundMessage(firebaseMessaging, (payload) => {
    console.log("SW: Message Received", payload);
    const notificationData = payload.notification;
    if (!notificationData) return;
    const { title, body } = notificationData;
    if (!(title && body)) return;
    const notificationOptions: NotificationOptions = {
      body,
      icon: undefined // サーバーのpublicフォルダーに入れている画像を通知に入れることができます。
    };
    self.registration.showNotification(title, notificationOptions);
  });
});
ここで、self を使っていますが、これはService Worker自身を表している定数です。普通のJavaScriptのメインスレッドだと、selfはwindowを表しているのです。
ビルド
yarn build-sw
結果

webpackのナンセンスが出てきましたね。とりあえずService Workerはこれでよし。
開発用のHTTPSサーバーを作成
Service Worker APIにはとてつもない権限とパワーがあります。しかも、Service Workerがやっていることを、ユーザーはほとんど知る由もない。
それゆえに、Service Worker APIはlocalhostもしくはhttpsの安全なドメインでなければ動きません。
webpackでは、httpsの開発用サーバーを作ることができるので、設定しておきます。
ただ、その前に、httpsで必要な証明書を作る必要があります。
HTTPS用のCertificateをローカル用に作成
mkcertというソフトウエアを使います。
https://github.com/FiloSottile/mkcert#installation
上記のリンクのインストールを実行します。macOSのbrewだと以下のようにインストールできます。
brew install mkcert
そして、プロジェクトのルートディレクトリで以下を実行します。
mkcert -key-file key.pem -cert-file cert.pem example.com *.example.com localhost
package.jsonのscriptsに保存しておくと、便利です。
json:package.json
{
"name": "firebase-fcm",
"version": "1.0.0",
"main": "index.js",
"license": "MIT",
"dependencies": {
"firebase": "^9.8.3"
},
"devDependencies": {
"@babel/core": "^7.18.5",
"@babel/preset-env": "^7.18.2",
"@babel/preset-typescript": "^7.17.12",
"babel-loader": "^8.2.5",
"typescript": "^4.7.3",
"webpack": "^5.73.0",
"webpack-cli": "^4.10.0"
},
"scripts": {
"mkcert": "mkcert -key-file key.pem -cert-file cert.pem example.com *.example.com localhost",
"build-sw": "webpack --config webpack.sw.config.js"
}
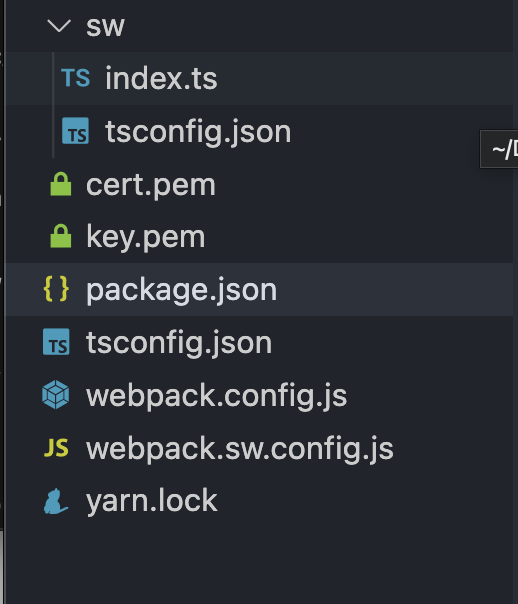
}そうすると、このように.pemファイルが二つ出力されます。これでOK!
メインスレッドのJavaScript用のwebpack設定
まず、html-webpack-pluginとwebpack-dev-serverを追加します。
yarn add -D html-webpack-plugin webpack-dev-server
そして、以下のようにwebpackを設定します。
javascript:webpack.config.js
const path = require("path");
const HtmlWebpackPlugin = require("html-webpack-plugin");
const fs = require("fs");
const webpack = require("webpack");

const port = 9000;

module.exports = {
  entry: "./src/index.ts",
  mode: "development",
  devtool: "inline-source-map",
  module: {
    rules: [
      {
        test: /\.(j|t)sx?$/,
        exclude: /node_modules/,
        use: {
          loader: "babel-loader",
          options: {
            presets: ["@babel/preset-env", "@babel/preset-typescript"],
          },
        },
      },
    ],
  },
  resolve: {
    extensions: [".tsx", ".ts", ".js", ".jsx"],
  },
  devServer: {
    static: {
      directory: path.join(__dirname, "public"),
    },
    https: {
      key: fs.readFileSync("./key.pem"),
      cert: fs.readFileSync("./cert.pem"),
    },
    compress: true,
    port,
  },
  output: {
    filename: "bundle.js",
    path: path.resolve(__dirname, "dist"),
  },
  plugins: [
    new HtmlWebpackPlugin({
      template: path.resolve(__dirname, "public", "index.html"),
    }),
    new webpack.EnvironmentPlugin({
      NODE_ENV: "development",
      FRONTEND_URI: `https://localhost:${port}/`,
      NOTIFICATION_URI: "https://localhost:" + "8081",
    }),
  ],
};
そして、package.jsonにDevサーバーを実行するscriptを追加しておきます。
json:package.json
{
  "name": "firebase-fcm",
  "version": "1.0.0",
  "main": "index.js",
  "license": "MIT",
  "dependencies": {
    "firebase": "^9.8.3"
  },
  "devDependencies": {
    "@babel/core": "^7.18.5",
    "@babel/preset-env": "^7.18.2",
    "@babel/preset-typescript": "^7.17.12",
    "babel-loader": "^8.2.5",
    "typescript": "^4.7.3",
    "webpack": "^5.73.0",
    "webpack-cli": "^4.10.0"
  },
  "scripts": {
    "mkcert": "mkcert -key-file key.pem -cert-file cert.pem example.com *.example.com localhost",
    "build-sw": "webpack --config webpack.sw.config.js",
    "start": "webpack --config webpack.sw.config.js && webpack serve"
  }
}
そしたら、以下を実行すれば、一度Service WorkerをコンパイルしてからDevサーバーを立ち上げてくれます。
yarn start
Service Workerはホットリローディングになっていないので、Service Workerを変更したら、yarn build-swを!
結果
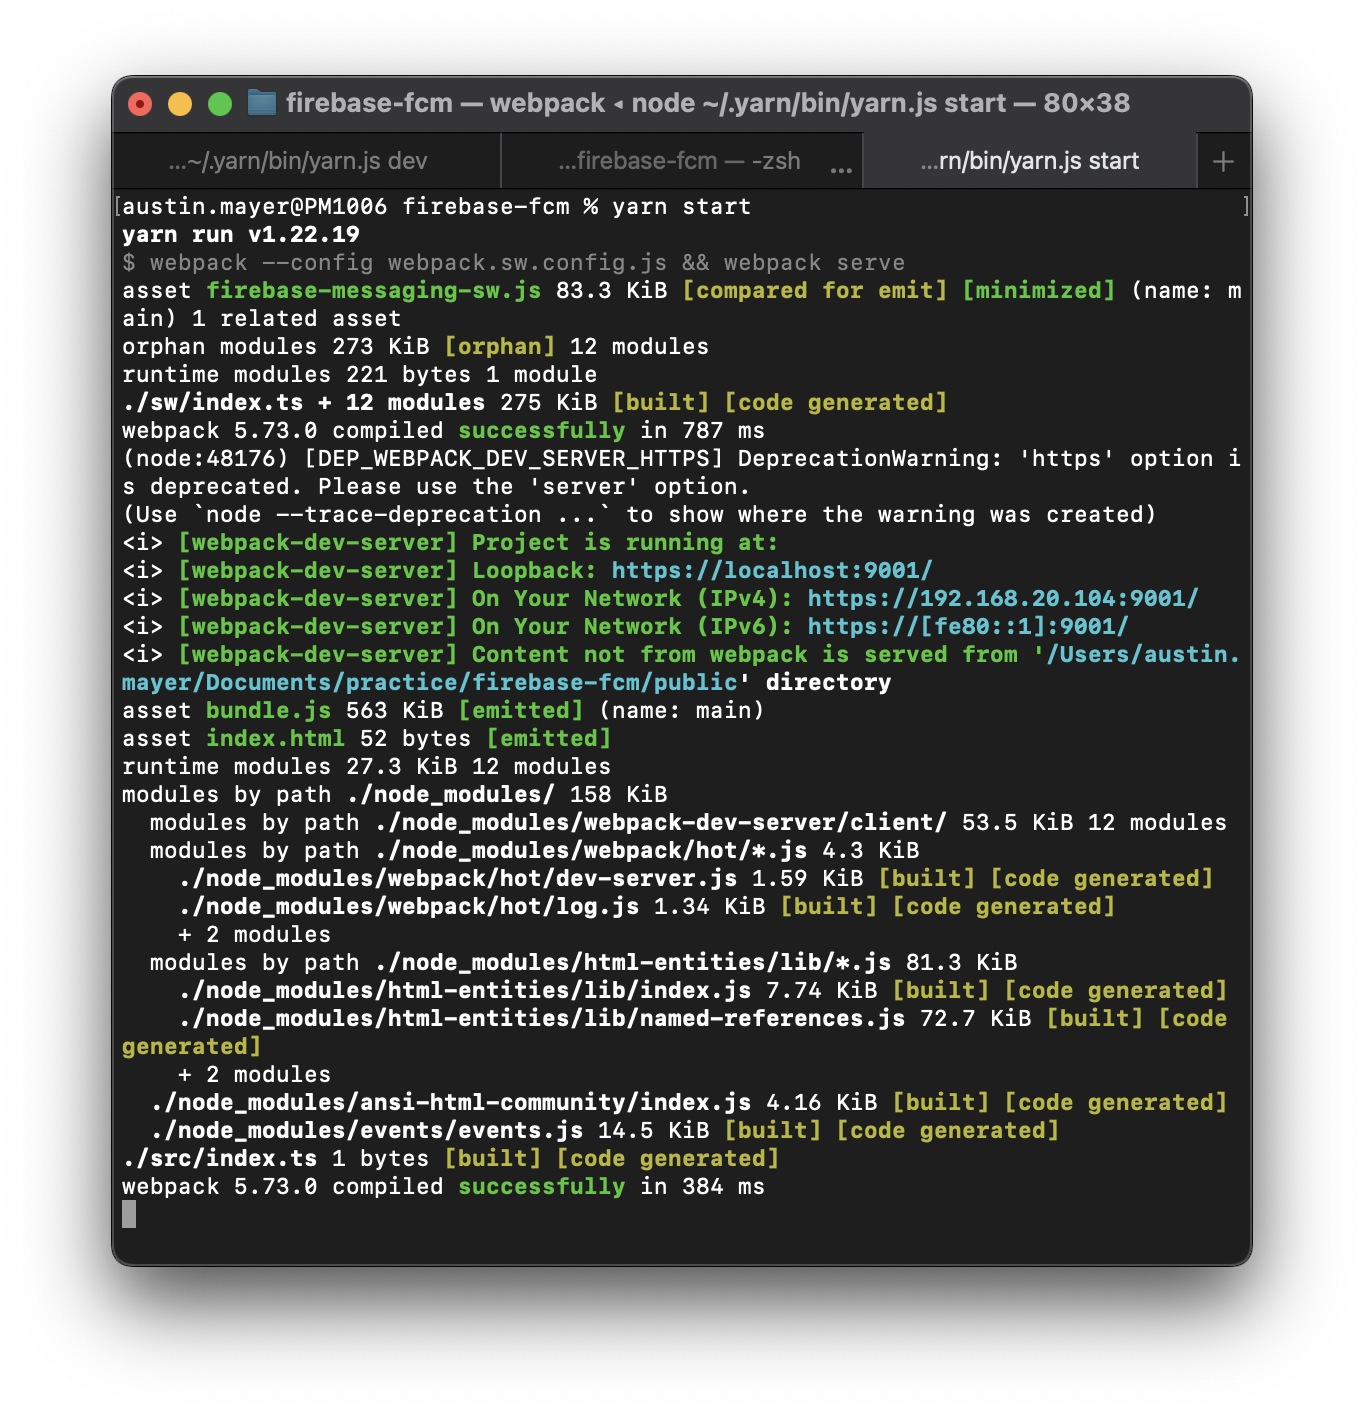
OKです!
JavaScriptメインスレッドでService Workerを立ち上げ
ここまで来たらあと一息!まじゅん ちばら!(一緒に頑張ろうの首里方言)
src/index.ts
if ("serviceWorker" in navigator) {
  navigator.serviceWorker.register("/firebase-messaging-sw.js").catch((error) => alert(error));
}
Service Worker APIをサポートしていない古いブラウザだったらエラーになるので、serviceWorkerのメソッドがブラウザ(navigator)にあるかどうかをチェックしましょう。
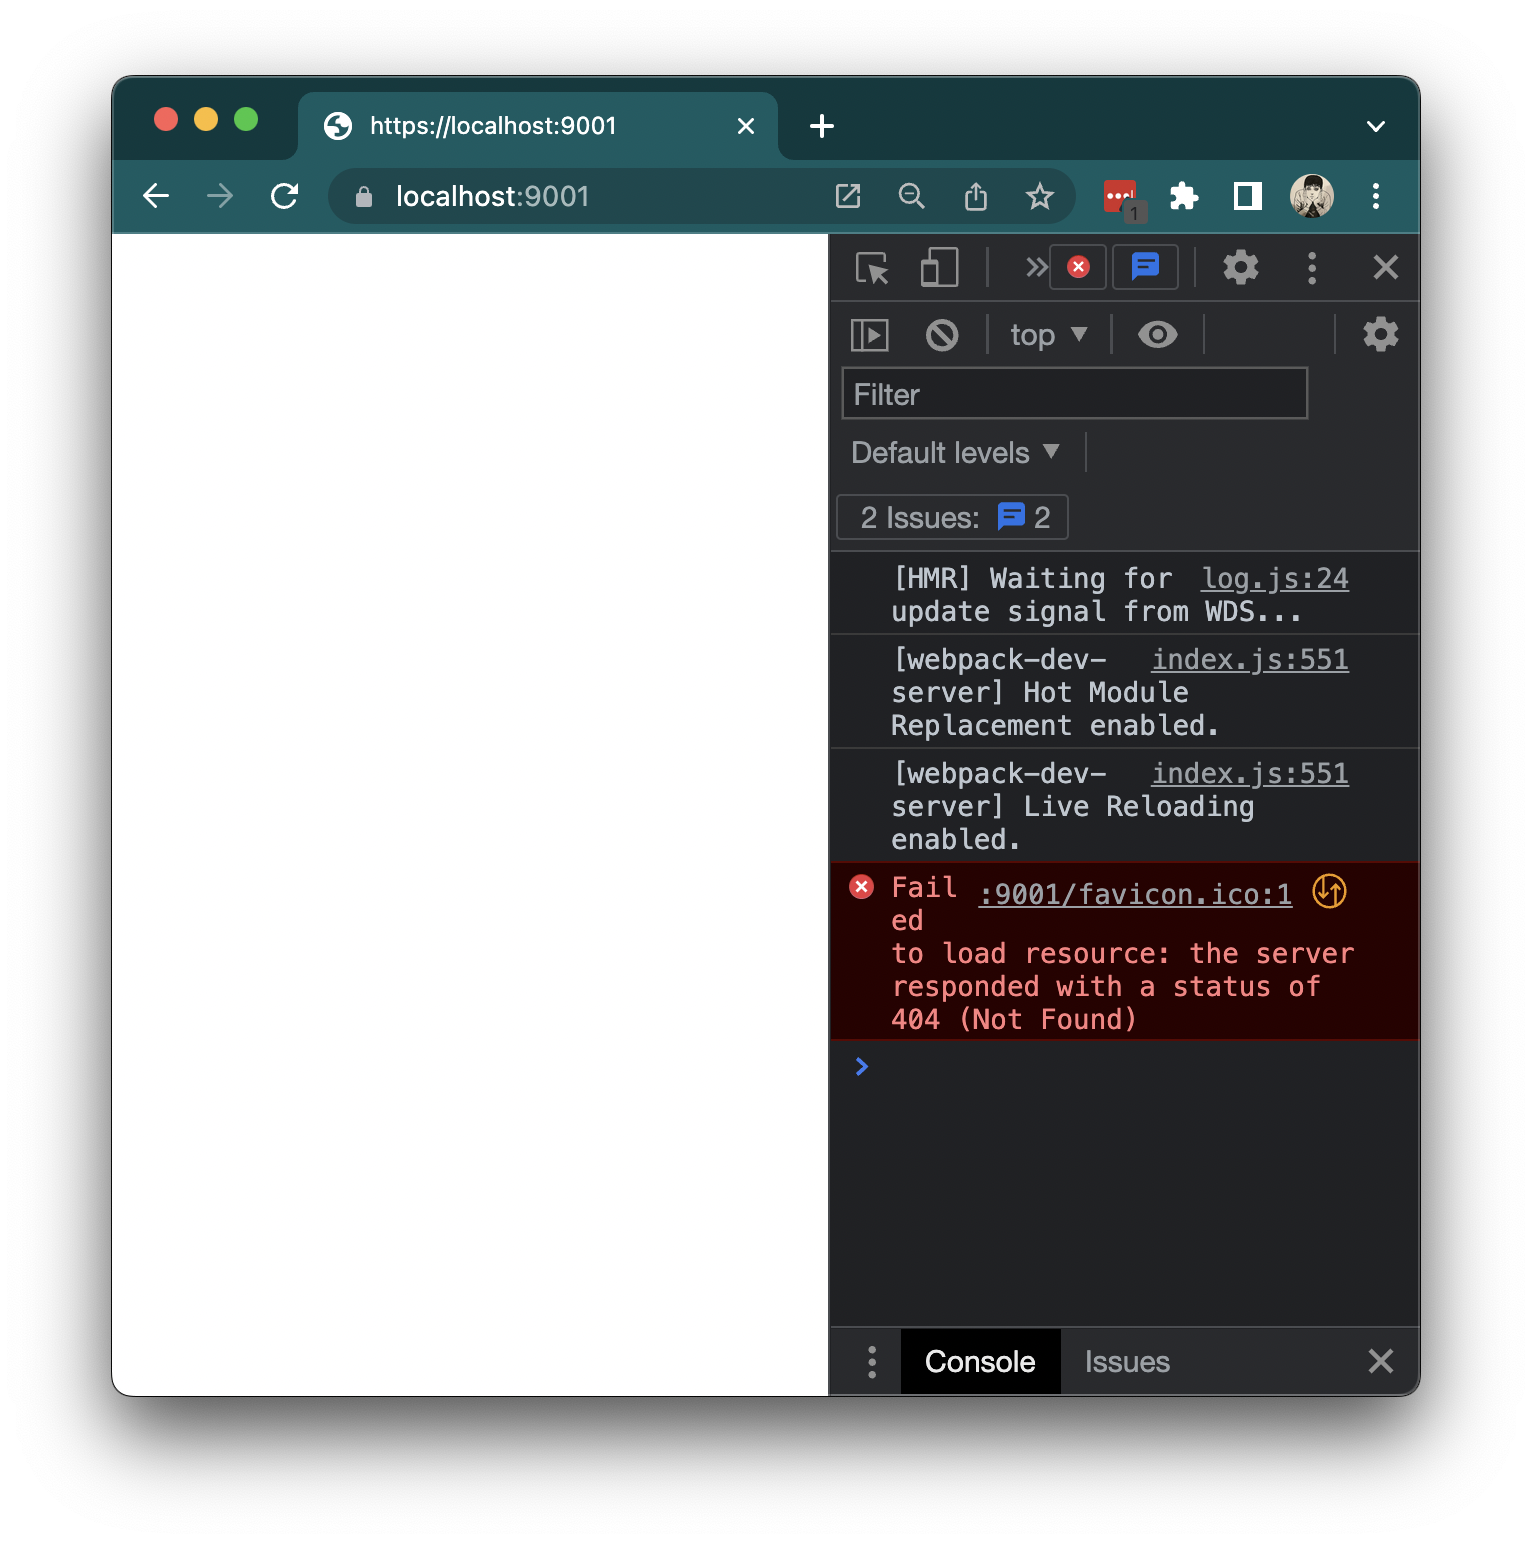
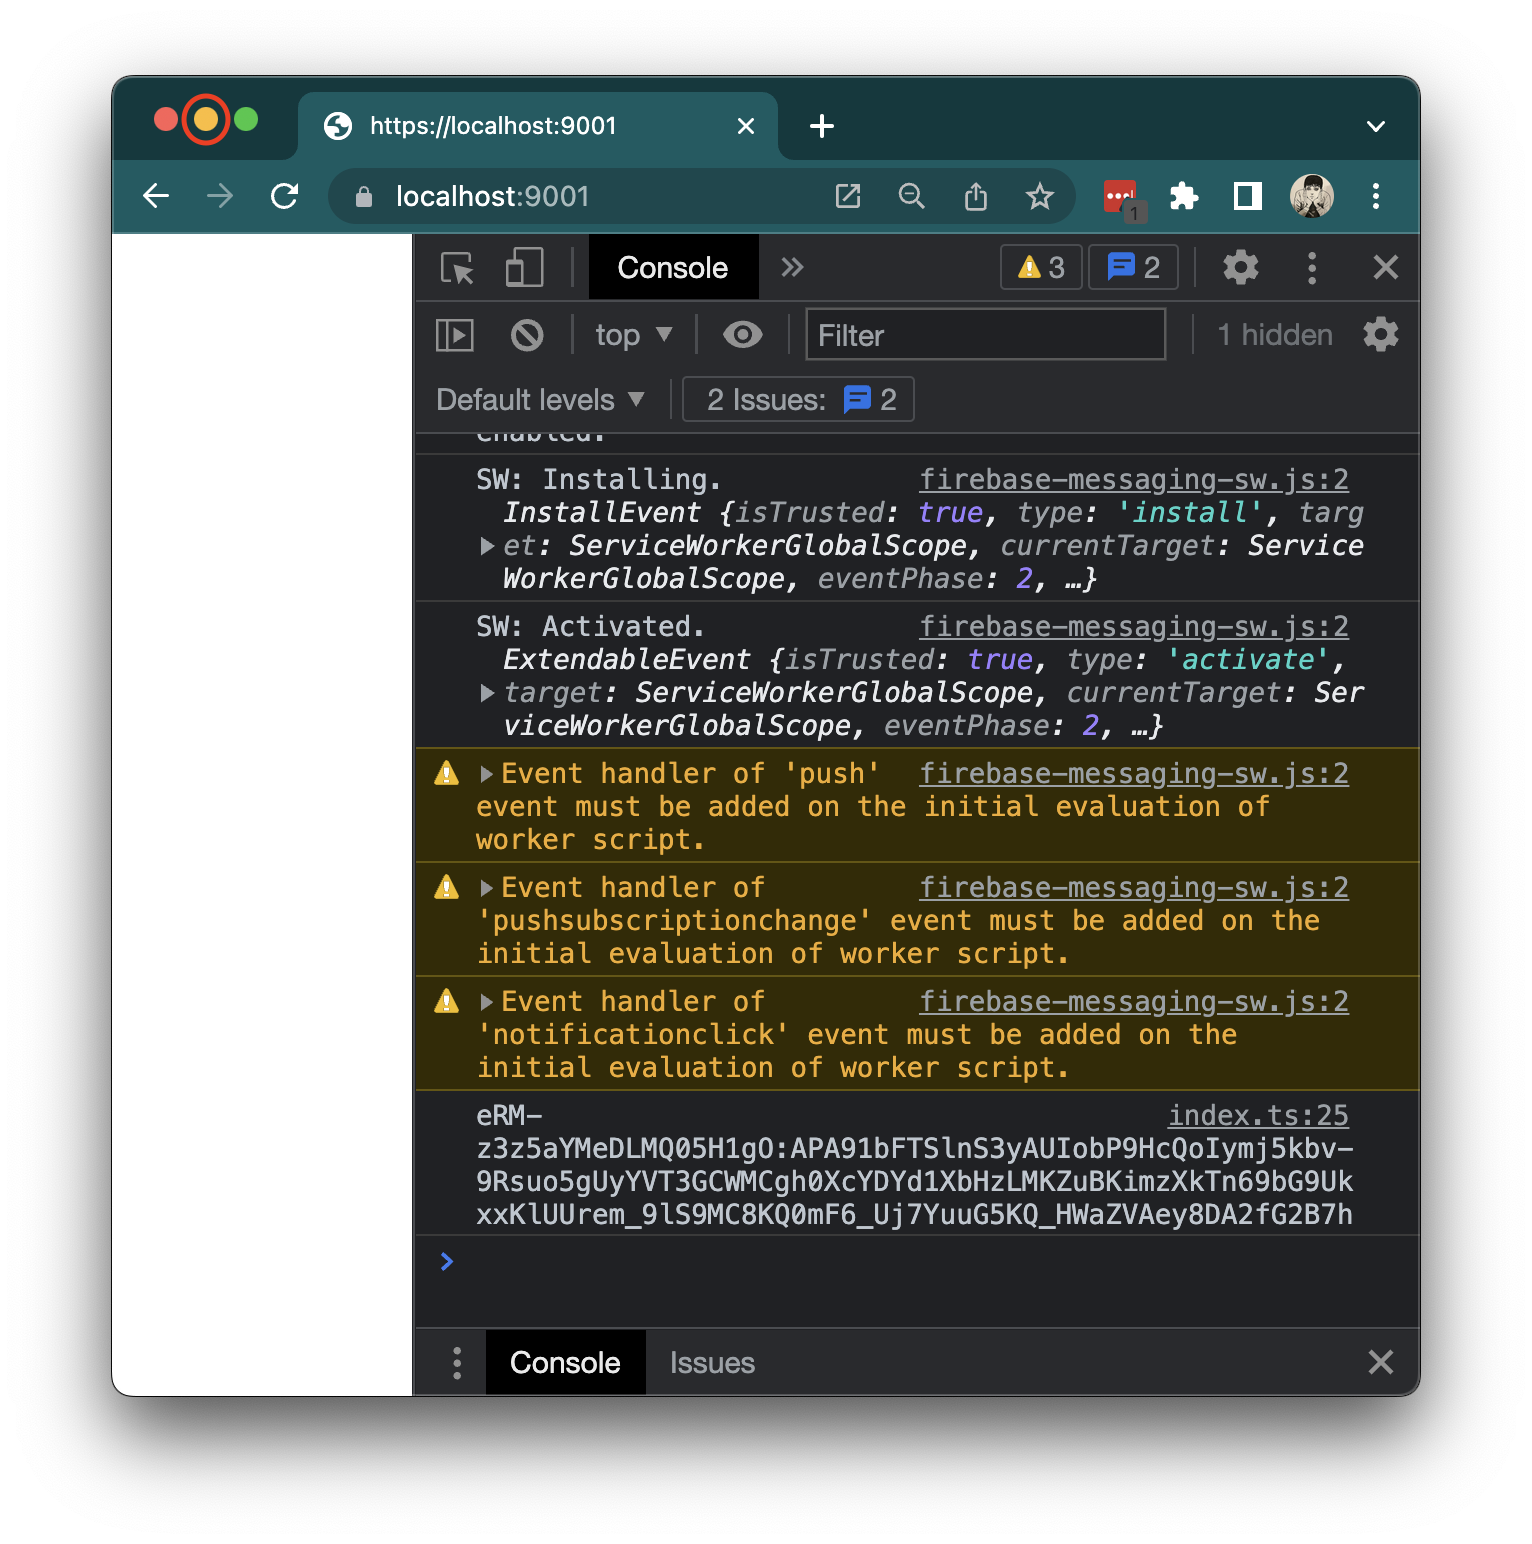
これを保存してみると、ホットリローディングでService Workerが起動するはず。

黄色いエラーは怖いのですが、調べてみたらこれはFirebase Messagingの構造上で起きるもので、特に気にする必要はありません(Webpackのバンドルを見ても、firebaseのpackageがPromise内でEventListenerを付けているのが引っかかっているよう)。
あとは、ユーザー通知を許可してもらう必要があるので、以下のコードを追加します。
typescript:src/index.ts
import { initializeApp } from "firebase/app";
import { getMessaging, getToken, isSupported } from "firebase/messaging";

if ("serviceWorker" in navigator) {
  navigator.serviceWorker.register("/firebase-messaging-sw.js").catch((error) => alert(error));
}

const app = initializeApp({
  apiKey: "AIzaSyDLJ...ANUQI",
  authDomain: "react-study-group-v3-forms.firebaseapp.com",
  databaseURL: "https://react-study-group-...tabase.app",
  projectId: "react-study-group-v3-forms",
  storageBucket: "react-study-group-v3-forms.appspot.com",
  messagingSenderId: "57...4062",
  appId: "1:57317...d627c3e138072f",
});

isSupported()
  .then((isSupported) => {
    if (!isSupported) throw Error("Browser does not support Firebase Cloud Messaging.");
    const messaging = getMessaging(app);
    return getToken(messaging);
  })
  .then((fcm) => {
    console.log(fcm); // これは、通知を送るのに使うコードです!
  })
  .catch((error) => alert(error));
これを保存すると、Chromeでは通知を出していいかどうかのプロンプトが出てきます。
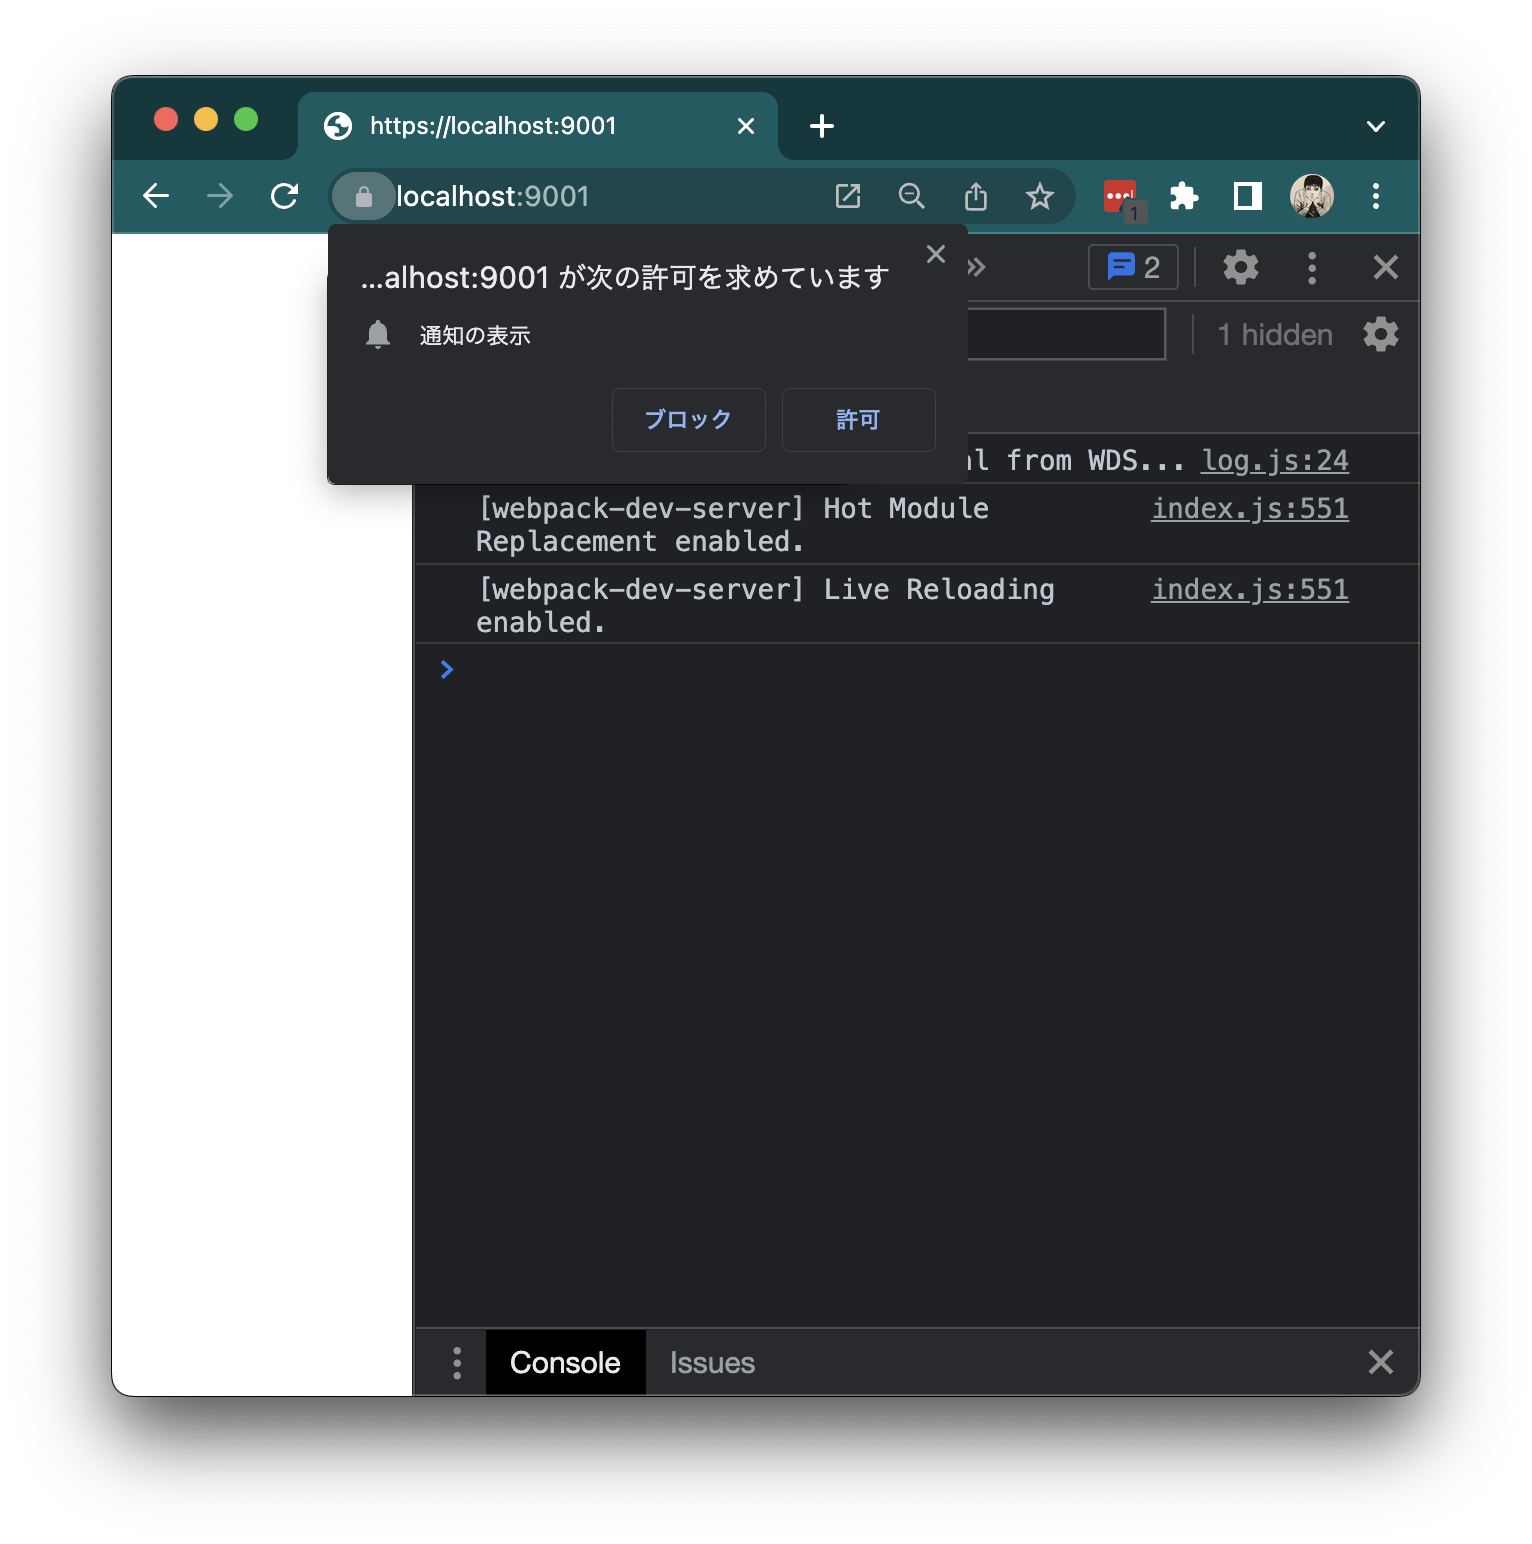
これを許可すると、consoleにFCMのコードが出力されます。こちらをコピーしておいてください。
通知を受け取れるようになりましたが、Firebaseは、ブラウザのWindowが縮小されていなければ、通知をネイティブトレーに出さないので、縮小しておきましょう。
Firebaseからテスト用のメッセージを送信
Firebase Consoleに戻って、Cloud Messagingのところからテストメッセージを送って、通知が出るかどうかを確認しましょう。
・FCM番号をコピーし
・エンゲージのCloud Messagingのリンクをクリックし
・初めてのメッセージをクリックし、
・タイトル、ボディを記入し、
・テストを送るのボタンをクリック
・FCMをペースト
・プラスボタンをクリック
・送信する
成功すれば、トレーに通知が出ます。

これでも通知が出んよ!という方は、お使いのパソコンの設定を念入りにご確認ください。
筆者は、ちなみに、半日出なくて、危うくパソコンを暗いところに押し込む寸前で、OS側でChromeが通知を出せないように設定していたことに気が付きました…
Node.jsで通知を送る
上記のFCMを使って、Node.jsのサーバーからも通知を送ってみましょう。
typescript:server/src/index.ts
import http from "http";
import path from "path";
import admin from "firebase-admin";
import { getMessaging } from "firebase-admin/messaging";

//prettier-ignore
const key = require(path.resolve(__dirname, "../", "react-study-group-v3-forms-firebase-adminsdk-qbr89-c07948a66d.json"));

const headers = {
  "Access-Control-Allow-Origin": "*",
  "Access-Control-Allow-Methods": "OPTIONS, POST, GET",
  "Access-Control-Max-Age": 2592000,
  "Content-Type": "application/json",
};

let lastMessage: string;
let lastMessageSentAt: Date;
const bootedAt = new Date();
const server = http.createServer((req, res) => {
  res.writeHead(200, headers);
  return res.end(
    JSON.stringify({
      bootedAt,
      lastMessage: lastMessage ?? "none",
      lastMessageSentAt,
    })
  );
});

const firebase = admin.initializeApp({
  credential: admin.credential.cert(key),
  databaseURL: "https://react-study-group-v3-forms-default-rtdb.asia-southeast1.firebasedatabase.app",
});

const messaging = getMessaging(firebase);

setInterval(
  () =>
    messaging.sendToDevice(
      "eRM-z3z5aYMeDLMQ05H1gO:APA91bFTSlnS3yAUIobP9HcQoIymj5kbv-9Rsuo5gUyYVT3GCWMCgh0XcYDYd1XbHzLMKZuBKimzXkTn69bG9UkxxKlUUrem_9lS9MC8KQ0mF6_Uj7YuuG5KQ_HWaZVAey8DA2fG2B7h",
      { notification: { title: "Node.jsから通知が!", body: "よかったさ、無事に届いたね。" } }
    ),
  60000
);

const port = 8081;
server.listen(port, () => console.log(`listening on ${port}`));
これで、1分おきに通知が来ます。来るかな…
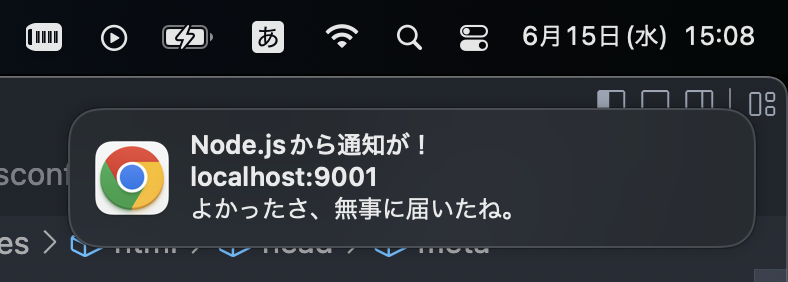
来た!
まとめ
以上、Firebase Cloud Messagingのサービスを使い、Push APIが使えるユーザー(つまり、Safari以外のユーザー)に通知を送る方法を紹介しました!
ただ、通知を出すことができても、出すべきかどうかはよく考えてください。ユーザー体験の向上に繋がるような通知を出すようにしたいのです。計画性を持たずに、むやみに通知を出すと、ユーザーが通知を無効にするばかりか、最悪な場合サービスを利用しなくなることすらあるかと思います。
効率的に通知の効果を分析するために、Firebaseのサービスが他にあります。
こちらをご覧ください。
このページをシェアする: